Sourdough Starter From Scratch Recipe
Introduction
Making a sourdough starter from scratch is a rewarding process that forms the foundation for delicious homemade sourdough breads and baked goods. With just flour, water, and a little patience, you can cultivate your own natural yeast and enjoy the unique flavors of artisanal baking.

Ingredients
- 1/2 cup bread flour (organic if possible; whole grain or whole wheat flour can also be used)
- Filtered water (quantity varies with each feeding, see instructions)
Instructions
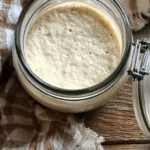
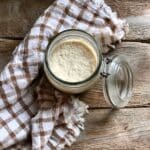
- Day 1: Combine 1/2 cup bread flour and 1/2 cup filtered water in a clean, wide-mouth jar. Stir vigorously, scraping down the sides. Cover with plastic wrap secured by a rubber band, or use a jar lid.
- Day 2: After 24 hours, check for bubbles or activity. If active, discard half of the starter into the trash. Feed it with 1/2 cup bread flour and 1/2 cup water. Stir, cover, and wait another 24 hours.
- Day 3: Discard half of the starter again, disposing in the trash. Feed with 1/2 cup bread flour and 1/4 cup water. Stir well, scrape down the sides, and cover.
- Days 4–10: Repeat the process daily: discard half the starter and feed with fresh flour and water. The starter should become bubbly, active, and start doubling in size. Be patient, as this can take time.
- Readiness: Your starter is ready to use when it doubles in size within 4–8 hours after feeding and has a light, clean sourdough aroma. It’s recommended to wait until day 14 before baking bread for best results.
- Optional: Transfer to a larger container if you wish to maintain a larger quantity for baking and sourdough discard recipes.
Tips & Variations
- Use filtered or bottled water to avoid chlorine, which can inhibit yeast growth.
- Whole grain or whole wheat flours can boost starter activity due to higher nutrient content.
- If your starter is slow to show activity, try keeping it in a warmer spot (around 70–75°F or 21–24°C).
- Feeding ratios can be adjusted slightly based on your starter’s behavior and consistency preferences.
Storage
Once established, store your sourdough starter in the refrigerator if not baking daily. Feed it at least once a week by discarding half and replenishing with fresh flour and water. Before baking, take it out, feed it, and let it become active at room temperature. If refrigerated, you may need 1–2 feedings over a day or two to revive it fully.
How to Serve
Serve this delicious recipe with your favorite sides.
FAQs
What if my starter doesn’t bubble or rise?
It can take up to two weeks for a starter to become fully active. Make sure you’re feeding it regularly with the right flour and water, and keep it at a warm room temperature. Avoid using chlorinated water and keep the jar loosely covered for airflow.
Can I use all-purpose flour instead of bread flour?
Yes, but bread flour or whole grain flours contain more protein and nutrients, which help develop a stronger and more active starter. If using all-purpose flour, the process may take slightly longer.
PrintSourdough Starter From Scratch Recipe
Learn how to make a sourdough starter from scratch with this easy step-by-step recipe. This natural fermentation process creates a bubbly and active starter perfect for baking delicious homemade sourdough bread, cookies, and other baked goods. With daily feeding and care, your starter will develop a light and clean sourdough aroma, making it ready to use within two weeks.
- Prep Time: 10 minutes
- Cook Time: 0 minutes
- Total Time: 14 days (including fermentation and feedings)
- Yield: Approximately 1 to 2 cups of sourdough starter 1x
- Category: Breakfast
- Method: No-Cook
- Cuisine: American
Ingredients
Ingredients
- 1/2 cup bread flour (organic if possible; whole grain or whole wheat flour can also be used)
- Filtered water as needed (approximately 1/2 cup to 1/4 cup per feeding)
Instructions
- Day 1: Mix Starter – In a clean wide-mouth jar, combine 1/2 cup bread flour and 1/2 cup filtered water. Stir vigorously with an offset spatula or fork, scraping down the sides of the jar to incorporate all flour. Cover the jar with plastic wrap secured by a rubber band or the jar’s lid.
- Day 2: Check Activity and Feed – After 24 hours, check your starter for any bubbles indicating fermentation. If active, discard half of the starter into the trash. Feed the remaining starter with 1/2 cup bread flour and 1/2 cup filtered water. Stir well and cover again.
- Day 3: Discard and Feed – Discard half of the starter, disposing of it in the trash. Feed the starter with 1/2 cup bread flour and 1/4 cup filtered water. Stir thoroughly, scrape down the sides, and cover the jar.
- Days 4 to 10: Daily Feedings – Repeat the process each day: discard half of your starter and feed with fresh flour and water. Your starter should become increasingly bubbly, active, and start doubling in size within hours after feeding. Be patient if activity is slow at first.
- Ready to Use – Your sourdough starter is ready to bake with once it consistently doubles in size within 4-8 hours after feeding and emits a light, clean sourdough aroma. This typically occurs by around day 14. Consider moving your starter to a larger container to maintain a larger quantity for ongoing baking and discard recipes.
Notes
- Use a scale for more precise feeding measurements if available, especially helpful for consistent results.
- The starter may take longer than 10 days to become fully active depending on environmental factors; patience is key.
- Keep the starter in a warm, draft-free area to promote fermentation.
- Discarded starter should be thrown away and not added back into the feed to avoid buildup of unwanted bacteria.
- Once established, you can refrigerate your starter and feed it weekly if not baking frequently.
Keywords: bread, sourdough, sourdough starter, fermentation, homemade bread