Gelatin Bubbles Recipe
Introduction
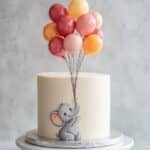
Gelatin bubbles are a visually stunning and fun edible decoration to add a whimsical touch to desserts and drinks. These delicate, glossy spheres are surprisingly easy to make with just a few simple ingredients and some patience. They’re perfect for impressing guests at parties or elevating your baking creations.
Ingredients
- 6 Tbsp unflavored gelatin (56g)
- 3/4 cup cold water (180g)
- Gel food coloring
- 3 Tbsp shortening
- Paper towels (to wipe the shortening)
- Luster dust (optional)
Instructions
- Step 1: Partially inflate 30 small balloons, tying a knot high up at the neck to create a somewhat spherical shape. For easier handling, you can tie the balloon to the end of a paper straw.
- Step 2: Coat each balloon with a thin layer of shortening. The surface should look shiny and lightly greased without visible white streaks—this will help the balloons release easily later.
- Step 3: In a small heat-proof bowl, combine 3/4 cup cold water and 6 Tbsp unflavored gelatin (maintaining a 2:1 water-to-gelatin ratio). Swirl gently to hydrate the gelatin and let it sit for a few minutes to bloom.
- Step 4: Heat the gelatin mixture in the microwave for about 20 seconds until warm and fluid, but not hot to the touch.
- Step 5: Stir in a few drops of gel food coloring and optional luster dust, ensuring the gelatin is fully dissolved. If necessary, heat in 10-second intervals, stirring between, until completely melted. Remove any foam or bubbles on the surface with a spoon to avoid cloudy gelatin bubbles.
- Step 6: Gently dip each balloon into the gelatin, rolling to cover most of the surface evenly. Shake off excess gelatin. If tied to straws, place them upright in a heavy glass; otherwise, rest the balloons tie-side down on a cooling rack.
- Step 7: If the gelatin thickens while dipping, reheat for 10 seconds to restore fluidity.
- Step 8: Dip the balloons a second time to create a stronger, more vibrant coating.
- Step 9: Allow balloons to dry and harden for about 12 hours or overnight. To speed drying, let them rest 30 minutes, then use a small fan on low speed for about 4 hours—be cautious not to blow bubbles away.
- Step 10: Once hardened, carefully puncture the balloon with scissors, then loosen and remove it from the gelatin shell.
- Step 11: Don’t worry if bubbles collapse slightly; they are sturdy and can be gently reshaped.
- Step 12: Trim any jagged edges around the base with sharp scissors. Your gelatin bubbles are now ready to use as a beautiful edible garnish!
Tips & Variations
- Use gel food coloring for vibrant, streak-free color; avoid liquid food coloring which may dilute the gelatin.
- Applying a very thin, even coat of shortening prevents white streaks and makes balloon removal easier.
- Try adding luster dust for an iridescent shine to your bubbles, perfect for festive occasions.
- If you don’t have balloons, small round molds with a removable core may work as an alternative but will require experimentation.
Storage
Gelatin bubbles are best used fresh, as they can become sticky or soft in humid conditions. Store them in a cool, dry place away from direct sunlight. If you must keep them longer, place them in an airtight container with silica packets to absorb moisture. Reheating is not recommended as it can cause them to lose shape and dissolve.
How to Serve
Serve this delicious recipe with your favorite sides.
FAQs
Can I use flavored gelatin instead of unflavored?
Unflavored gelatin is preferred to maintain control over the flavor and appearance. Flavored gelatin may affect the taste and color unpredictably, but you can experiment if you want a flavored bubble.
How do I prevent the gelatin bubbles from collapsing after removing the balloon?
Make sure the bubbles are fully dried and hardened overnight before removing the balloon. Handle gently while removing and trimming edges to maintain their shape. Using two coats of gelatin also improves strength and stability.
PrintGelatin Bubbles Recipe
Gelatin bubbles are delicate, colorful edible spheres made by coating small balloons with a thin layer of flavored gelatin. These translucent bubbles can be used as a whimsical garnish or a fun addition to desserts and drinks. The process involves hydrating gelatin, adding food coloring, coating the balloons twice, and allowing them to harden overnight for a beautiful, lightweight decoration.
- Prep Time: 15 minutes
- Cook Time: 25 minutes (includes gelatin heating and dipping process)
- Total Time: 4 hours 40 minutes (includes drying time overnight)
- Yield: 30 gelatin bubbles 1x
- Category: Dessert Garnish
- Method: No-Cook
- Cuisine: Western
Ingredients
Gelatin Mixture
- 6 Tbsp (56g) unflavored gelatin
- 3/4 cup (180g) cold water
- Gel food coloring (a few drops, as desired)
- Luster dust (optional, for shimmer)
Coating and Tools
- 3 Tbsp shortening
- 30 small balloons
- Paper towels (for wiping shortening)
- Paper straws (optional, for handling balloons)
Instructions
- Prepare Balloons: Partially inflate each of the 30 small balloons, tying a knot high on the neck to create a spherical shape. Optionally, tie balloons to paper straws for easier handling.
- Apply Shortening: Using paper towels, coat each balloon evenly with a thin, shiny layer of shortening, ensuring no white streaks remain. This greasing helps with easy removal later.
- Hydrate Gelatin: In a small heat-proof bowl, pour 3/4 cup cold water, add 6 Tbsp unflavored gelatin, and gently swirl to dissolve. Let it sit for a few minutes to bloom (absorb water).
- Heat Gelatin: Microwave the bowl for approximately 20 seconds until the gelatin is warm and fluid but not hot. Stir well to dissolve completely.
- Add Color and Luster: Mix in gel food coloring and optional luster dust thoroughly. If undissolved, microwave additional 10-second intervals and stir. Remove any foam or bubbles on top with a spoon for clear bubbles.
- First Dip: Carefully dip each balloon into the gelatin mixture, rolling to coat evenly with a thin layer. Shake off excess gelatin. Place balloons in a heavy glass if tied to straws, or rest tie-side down on a cooling rack.
- Reheat if Needed: If gelatin thickens during dipping, reheat in the microwave for 10 seconds to maintain fluidity.
- Second Dip: After the first coat dries slightly, dip balloons again for a stronger, more vivid coating.
- Drying: Let the gelatin-coated balloons sit for 12 hours or overnight at room temperature to harden fully. To speed drying, use a small fan on low after 30 minutes, ensuring bubbles aren’t blown away.
- Remove Balloons: Gently puncture the balloon with scissors once hardened, allowing it to deflate. Carefully separate and remove the balloon from the gelatin bubble.
- Fix Indents: If the bubble collapses slightly, gently pop it back into shape as the gelatin is sturdy and flexible.
- Trim Edges: Use sharp scissors to clean up any jagged edges around the base of each bubble before using as decoration or garnish.
Notes
- Ensure the balloons are coated evenly with shortening to prevent sticking and make removal easier.
- Remove any foam on the gelatin surface before dipping to prevent cloudy or bubbly textures on the final bubbles.
- Use a fan on low speed cautiously to avoid blowing the fragile bubbles away.
- Gelatin bubbles are delicate; handle carefully after removing balloons to maintain shape.
- Luster dust is optional but can add a beautiful shimmer for more visual appeal.
- Double coating with gelatin strengthens the bubbles and enhances color vibrancy.
Keywords: gelatin bubbles, edible bubbles, dessert garnish, gelatin decorations, colorful bubbles, gelatin craft