Twix Cookie Cups Recipe
Introduction
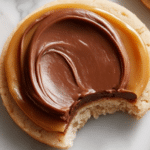
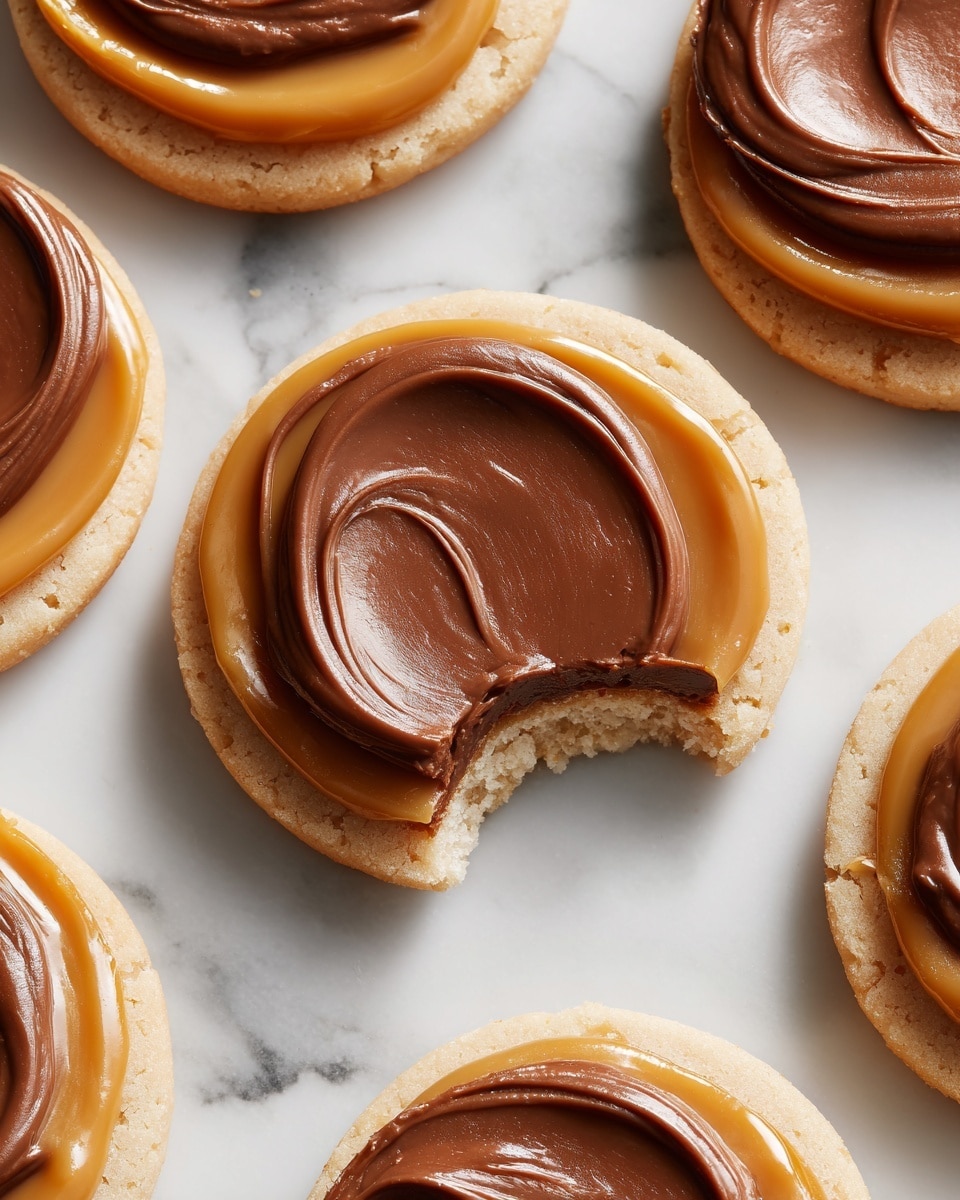
Twix Cookie Cups combine a soft sugar cookie crust with creamy caramel and a smooth milk chocolate topping. These delightful treats capture all the classic Twix flavors in a fun, homemade form that’s perfect for sharing or snacking.
Ingredients
- 1/2 cup (111g) salted butter
- 1/2 cup (115g) granulated sugar
- 1 tsp vanilla extract
- 1 egg white
- 1 1/2 cups (228g) all-purpose flour
- 1 tsp baking powder
- 20 caramels, unwrapped
- 1 tbsp milk
- 2 cups (400g) milk chocolate chips
Instructions
- Step 1: Preheat your oven to 350°F (175°C).
- Step 2: Cream together the salted butter and granulated sugar until light and fluffy.
- Step 3: Add the egg white and vanilla extract, mixing until well combined.
- Step 4: Stir in the all-purpose flour and baking powder until the dough comes together evenly.
- Step 5: Roll out the dough to about 1/4 to 1/2 inch thickness. Use a round cookie cutter to cut out circles and transfer them to an ungreased cookie sheet.
- Step 6: Bake the cookies for 6-8 minutes, until puffy and no longer glossy. Remove from oven and transfer to a wire rack to cool completely.
- Step 7: While the cookies cool, microwave the unwrapped caramels and milk together for 1 minute, stirring halfway through, until smooth and creamy.
- Step 8: Spoon a few teaspoons of caramel onto each cooled cookie, spreading it to nearly cover the surface.
- Step 9: Place the caramel-topped cookies in the refrigerator for 10-15 minutes until the caramel is fully chilled.
- Step 10: Melt the milk chocolate chips in 30-second intervals, stirring in between, until smooth.
- Step 11: Spread a thin layer of melted chocolate over the caramel layer on each cookie. Let the chocolate cool and set before serving.
Tips & Variations
- For a crunchier base, bake the cookie circles a minute or two longer, but watch carefully to avoid browning.
- Try dark chocolate chips instead of milk chocolate for a richer finish.
- Add a sprinkle of sea salt on top of the chocolate before it sets for a sweet and salty contrast.
- If you don’t have caramels, use thick dulce de leche or caramel sauce as a delicious alternative.
Storage
Store the Twix Cookie Cups in an airtight container in the refrigerator for up to 5 days. Let them come to room temperature before serving for the best flavor and texture. If needed, you can gently rewarm to soften the caramel by placing them in a warm spot for a few minutes.
How to Serve
Serve this delicious recipe with your favorite sides.
FAQs
Can I make the cookie dough ahead of time?
Yes, you can prepare the dough and refrigerate it for up to 2 days before rolling and baking. Let it come to room temperature slightly for easier handling.
What if I don’t have a cookie cutter?
If you don’t have a cookie cutter, use the rim of a glass or cup to cut out even circles from the dough.
PrintTwix Cookie Cups Recipe

Twix Cookie Cups combine a soft sugar cookie base with a creamy, smooth caramel topping and a luscious milk chocolate layer, recreating the iconic Twix bar flavor in a fun and easy homemade treat.
- Prep Time: 10 minutes
- Cook Time: 10 minutes
- Total Time: 40 minutes
- Yield: 24 cookie cups 1x
- Category: Dessert
- Method: Baking
- Cuisine: American
Ingredients
Cookie Dough
- 1/2 cup (111g) salted butter
- 1/2 cup (115g) granulated sugar
- 1 tsp vanilla extract
- 1 egg white
- 1 1/2 cups (228g) all-purpose flour
- 1 tsp baking powder
Carmel Layer
- 20 caramels, unwrapped
- 1 tbsp milk
Chocolate Topping
- 2 cups (400g) milk chocolate chips
Instructions
- Preheat the oven: Set your oven to 350°F (175°C) and allow it to preheat while you prepare the cookie dough.
- Cream butter and sugar: In a mixing bowl, use a stand mixer with a flex edge beater to cream together the 1/2 cup salted butter and 1/2 cup granulated sugar until light and fluffy.
- Add egg white and vanilla: Mix in 1 egg white and 1 tsp vanilla extract until the ingredients are well combined and smooth.
- Incorporate dry ingredients: Add 1 1/2 cups all-purpose flour and 1 tsp baking powder to the wet mixture and mix thoroughly to form a soft dough.
- Roll and cut dough: Roll out the dough to about 1/4 to 1/2 inch thickness. Use a round cookie cutter to cut into circles and transfer the circles onto an ungreased cookie sheet.
- Bake cookie crusts: Bake in the preheated oven for 6-8 minutes until the cookies are puffy and no longer glossy. Remove from oven and transfer to a wire rack to cool completely.
- Prepare caramel sauce: While cookies cool, microwave 20 unwrapped caramels with 1 tbsp milk for 1 minute, stirring halfway through at 30 seconds, until smooth and creamy.
- Apply caramel layer: Spoon a few teaspoons of caramel onto each cooled cookie and spread to almost cover the surface.
- Chill cookies: Place the caramel-topped cookies in the refrigerator for 10 to 15 minutes or until the caramel is completely cold and set.
- Melt chocolate: Microwave 2 cups milk chocolate chips in 30-second intervals, stirring between each, until fully melted and smooth.
- Add chocolate topping: Spread a small amount of melted chocolate over the caramel layer on each cookie cup.
- Set chocolate layer: Allow the chocolate to cool and harden before serving your delicious Twix Cookie Cups.
Notes
- Ensure cookies have fully cooled before adding caramel to prevent the caramel from melting too much and becoming runny.
- Use an ungreased pan for baking to help cookies hold their shape better.
- Microwaving chocolate in short intervals prevents burning and ensures smooth melting.
- Store finished cookie cups in an airtight container in the refrigerator to maintain their shape and freshness.
- For easier caramel spreading, warm the caramel slightly to keep it soft but not hot.
Keywords: Twix Cookie Cups, sugar cookie cups, homemade Twix, caramel cookie, chocolate cookie dessert, easy cookie recipe